How to Care for a Wound at Home After Surgery: A Nurse's Guide
Returning home after surgery feels like a huge relief — but for many patients and their families, the real challenge begins right there: at home, staring at a bandaged incision and wondering, “Am I doing this right?”
This comprehensive nurse’s guide on how to care for a wound at home after surgery has been prepared by the clinical care team at Zenlife Home Healthcare Pvt Ltd to walk you through every step — from cleaning the wound properly to recognising early signs of infection. Whether you’ve had a minor procedure or a major operation, this guide will help you heal safely, confidently, and comfortably.
Why Proper Post-Surgical Wound Care Matters
Surgical wounds are not ordinary cuts. They are carefully made incisions that your body needs time, nutrition, and cleanliness to close and repair. Poor wound care at home is one of the leading causes of surgical site infections (SSIs), delayed healing, and unnecessary hospital readmissions.
According to the World Health Organization (WHO), surgical site infections affect up to 11% of surgical patients in low- and middle-income countries, and most of these infections are preventable with proper wound hygiene and timely care.
The good news? With the right knowledge, the right supplies, and a calm, consistent routine, caring for a surgical wound at home is entirely manageable.
What to Expect: Understanding the Normal Wound Healing Process
Before we dive into wound care steps, it helps to understand what normal healing actually looks like. Many patients panic unnecessarily, while others ignore warning signs they should act on. Knowing the difference is crucial.
The Four Stages of Wound Healing
- Haemostasis (0–24 hours): The body immediately works to stop bleeding. You may notice the wound edges are slightly pink and tender.
- Inflammation (Days 1–5): Mild redness, warmth, and swelling around the incision are completely normal during this stage. Your immune system is sending repair signals to the area.
- Proliferation (Days 5–21): New tissue begins to form. The wound may itch — a good sign that healing is progressing. The scar starts to close and strengthen.
- Remodelling (Weeks 3–2 years): The scar matures, flattens, and fades gradually.
Understanding these stages helps you distinguish normal wound healing vs infection — something every caregiver and patient must know.
How to Care for a Wound at Home After Surgery: Step-by-Step Nurse's Guide
Step 1: Wash Your Hands First — Always
This is the single most important rule in wound care. Before touching your wound, dressing, or any supplies, wash your hands thoroughly with soap and water for at least 20 seconds. Alternatively, use a hand sanitiser with at least 60% alcohol content.
This simple act eliminates the primary route of infection. Never skip it.
Step 2: Gather Your Wound Care Supplies
Before you begin, assemble everything you need so you are not fumbling mid-process. A basic home wound care kit should include:
- Sterile gauze pads (preferred over non-sterile pads for fresh wounds)
- Medical-grade saline solution for wound rinsing
- Mild soap — the best soap for surgical wounds is a gentle, fragrance-free antibacterial soap or plain mild soap as directed by your surgeon
- Surgical tape or wound closure strips
- Non-adherent dressings to prevent sticking to healing tissue
- Medical gloves (disposable)
- Scissors and tweezers (sterile)
- A clean, well-lit space
Sterile gauze vs non-sterile pads: For the first two weeks post-surgery, always choose sterile gauze. Non-sterile dressings carry a higher microbial load that can introduce infection to a fresh surgical site.
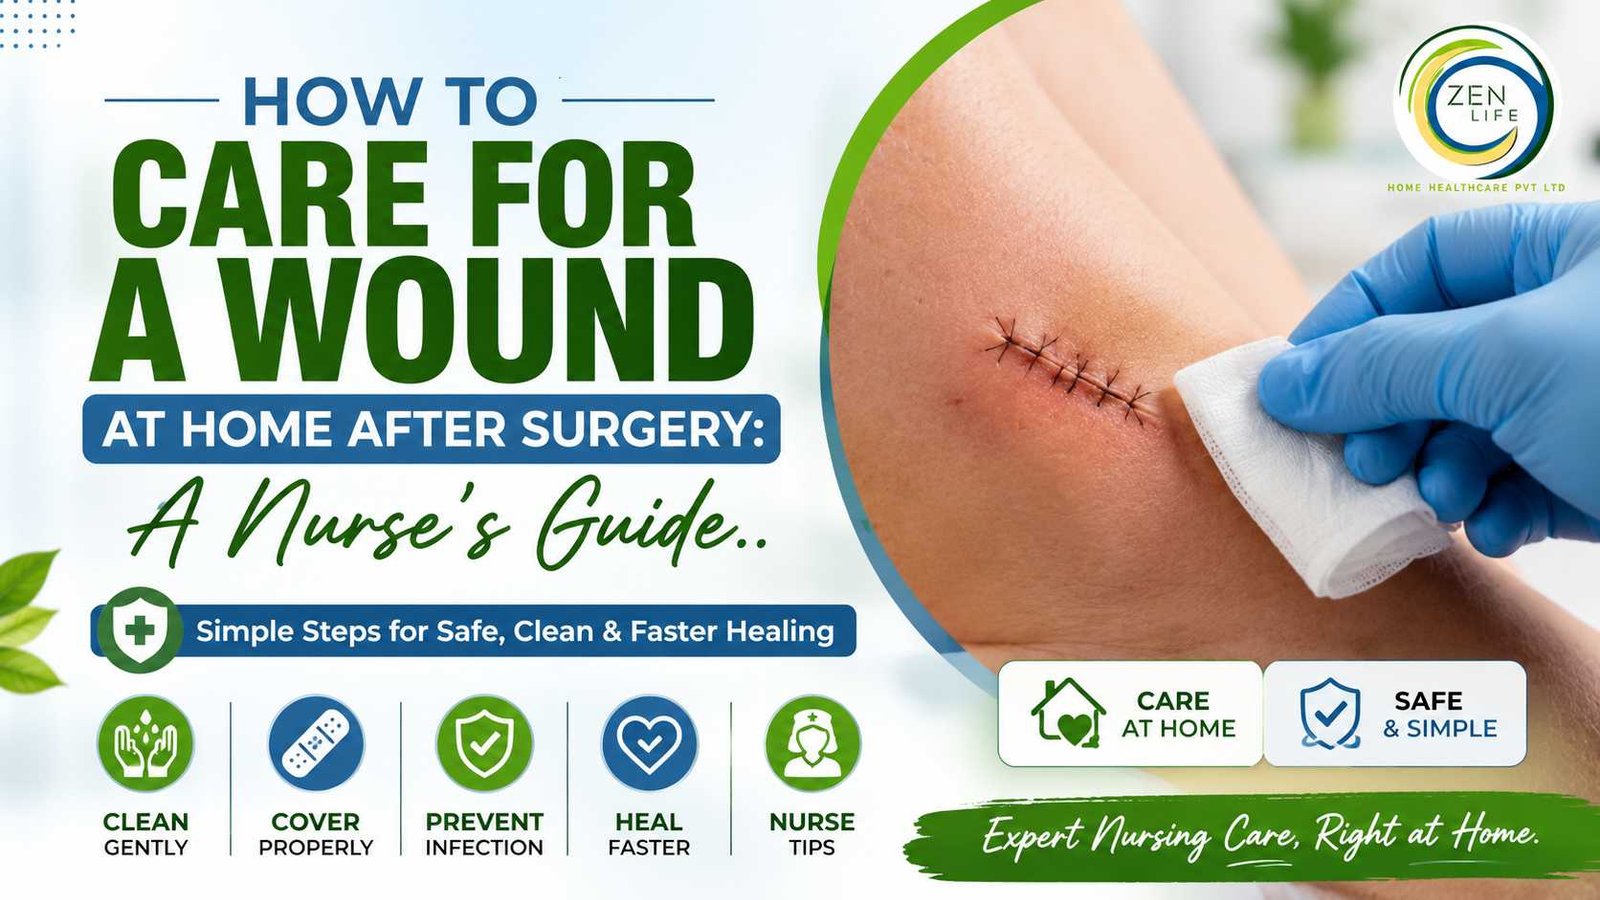
Step 3: How to Clean a Surgical Incision at Home
Cleaning the wound correctly is the cornerstone of how to care for a wound at home after surgery. Here is the step-by-step process our nurses recommend:
- Remove the old dressing carefully. Gently lift the edges of the dressing or tape. If it is sticking, dampen it slightly with saline solution before pulling. This is the safest technique for removing surgical tape without causing a skin tear.
- Inspect the wound. Before cleaning, take a moment to look at the incision. Note the colour, edges, any discharge, and surrounding skin condition. This inspection habit will help you spot early warning signs.
- Rinse with saline solution. Using a syringe or clean cotton, gently irrigate the wound with sterile saline solution. Saline is isotonic — it matches your body’s natural fluids and does not damage healing tissue the way hydrogen peroxide or iodine can. Unless your surgeon specifically prescribes otherwise, saline rinse is the gold standard for home wound cleaning.
- Clean around the incision. Using a soft gauze pad dampened with saline or mild soap and water, gently wipe around the wound — not over it — in a single stroke per pad. Always move away from the incision to avoid dragging bacteria back onto the wound.
- Pat dry. Use a clean, dry sterile gauze pad to gently pat the area dry. Never rub.
- Apply prescribed ointment if directed. Some surgeons recommend a thin layer of antibiotic ointment. Only apply if specifically instructed by your medical team.
Step 4: Changing Surgical Bandages — Step by Step
How often to change wound dressings depends on the type of wound, the amount of drainage, and your surgeon’s specific instructions. As a general guideline:
- Active drainage: Change dressings once or twice daily
- Dry, healing wounds: Once daily or every two days is usually sufficient
- Immediately: Whenever a dressing becomes wet, soiled, or falls off
Changing surgical bandages step by step:
- Wash hands
- Remove old dressing using gloves
- Inspect the wound
- Clean as described above
- Apply a fresh sterile dressing over the wound
- Secure with surgical tape, avoiding tension on the skin
- Dispose of old dressings in a sealed bag
Do not use cotton balls directly on open wounds — fibres can embed in healing tissue and cause complications.
Identifying Infection: Signs You Must Never Ignore
One of the most critical parts of this nurse’s guide on how to care for a wound at home after surgery is knowing when something is going wrong. Signs of surgical site infection can appear as early as Day 3–4 post-operatively.
Warning Signs of Surgical Site Infection
Redness and swelling after surgery that is spreading beyond the wound edges, rather than staying localised, is a red flag. A small halo of pink around a fresh incision is normal; redness that creeps further each day is not.
Purulent drainage (pus) — thick, yellow, green, or brown fluid — is a major sign of infection. Normal wound discharge in the first 24–48 hours is typically clear or slightly blood-tinged (serous or serosanguineous). Thick, cloudy, or coloured discharge signals bacterial activity.
Wound odour warning signs: A foul or unusually strong smell from the wound site suggests bacterial overgrowth and requires immediate medical attention.
Fever: A temperature above 38°C (100.4°F) in a post-surgical patient is a significant concern. Fever combined with localised wound symptoms strongly suggests infection.
Increasing pain: Pain that worsens after the first few days rather than improving is not normal. Surgical wounds should progressively hurt less, not more.
Wound edges separating: If your incision begins to open or pull apart, this is a serious complication called wound dehiscence. Cover it with a clean dressing and call your healthcare provider immediately.
When to Call the Doctor About a Wound
Call your surgeon or healthcare team immediately if you notice:
- Spreading redness, warmth, or red streaks
- Pus or foul-smelling discharge
- Fever over 38°C
- The wound is opening or stitches/staples are falling out
- Severe or worsening pain at the site
- Numbness or tingling around the incision
For immediate post-operative concerns, you can always reach out to Zenlife Home Healthcare Pvt Ltd — our trained nursing staff provides home visits and telephonic support for wound care and post-surgical recovery.
Pain and Swelling Management at the Surgical Site
Discomfort after surgery is expected, but it can be managed effectively at home.
How to Reduce Swelling After Surgery
- Elevation: Keep the operated area elevated above heart level whenever possible, especially in the first 48–72 hours. This reduces fluid pooling (oedema) in the tissues.
- Ice packs for surgical sites: Applying a cold pack wrapped in a thin cloth for 15–20 minutes every 2–3 hours in the first 48 hours can significantly reduce swelling. Never apply ice directly to skin or over a fresh incision.
- Compression: For limb surgeries, compression stockings for wound healing may be recommended by your surgeon to support circulation and minimise swelling.
- Movement within limits: Gentle movement (as approved by your doctor) promotes blood circulation, which aids healing.
Managing Incision Pain at Home
- Take prescribed pain medication on schedule rather than waiting until pain becomes severe
- Use sleeping positions for surgical wounds that avoid direct pressure on the incision. A rolled pillow or bolster can help.
- For superficial pain relief for skin stitches, your doctor may allow paracetamol or mild anti-inflammatory medication
- Avoid aspirin unless prescribed, as it thins the blood and can interfere with clotting
Stitch and Staple Care: What Every Patient Needs to Know
How Long Do Surgical Staples Stay In?
Surgical staples are typically removed between 7 and 21 days after surgery, depending on the wound location and your healing progress. Scalp staples usually come out in 7–10 days, while abdominal staples may stay for up to 14–21 days.
Caring for Non-Dissolvable Stitches
Non-absorbable sutures require careful daily care:
- Keep them clean and dry as directed
- Do not pull or pick at the suture ends
- Avoid soaking the wound in water (no baths, swimming pools, or hot tubs) until cleared by your surgeon
- Pat the area dry after cleaning
How to keep stitches dry: When showering, cover the wound with a waterproof dressing or plastic wrap secured with tape. Brief exposure to gentle water is usually acceptable; prolonged soaking is not.
Stitches Popping Open — What to Do
If you notice your stitches popping open, do not panic but act quickly:
- Cover the area with a clean, sterile dressing
- Do not attempt to re-close the wound yourself
- Call your surgeon or visit an emergency facility promptly
Dissolvable Suture Timeline
Dissolvable (absorbable) sutures are designed to be absorbed by your body over time. Depending on the type used:
- Fast-absorbing sutures: Dissolve in 10–14 days
- Standard absorbable sutures: May take 60–90 days to fully dissolve
- Long-term absorbable sutures: Can remain for up to 6 months in deep tissue layers
Do not attempt to remove them yourself. If a loop is protruding and causing irritation, contact your medical team.
Signs of Stitch Rejection
Although rare, some patients experience a reaction to suture material. Signs of stitch rejection include persistent redness and swelling along suture lines, small pimples or blisters forming near stitches, and a feeling of tightness or unusual pain around the suture site. Report these signs to your surgeon.
Diet and Lifestyle for Faster Wound Healing
Wound healing is not just about what happens on the surface. What you put into your body and how you live in the weeks after surgery profoundly affects how quickly and cleanly your wound heals.
Best Foods for Wound Healing
Nutrition is the fuel for tissue repair. The best foods for wound healing are:
- Protein-rich foods: Chicken, fish, eggs, paneer, lentils, and legumes. Protein requirements for tissue repair are significantly elevated after surgery — aim for 1.2 to 1.5 grams of protein per kilogram of body weight daily.
- Vitamin C sources: Amla (Indian gooseberry), citrus fruits, bell peppers, and guava. Vitamin C is essential for collagen synthesis — the protein that rebuilds skin and tissue.
- Zinc-rich foods: Pumpkin seeds, chickpeas, and nuts support immune function and cell repair.
- Iron sources: Spinach, beetroot, and fortified cereals help maintain healthy red blood cell counts for oxygen delivery to healing tissue.
Vitamins for Surgical Recovery
Beyond food, the following are well-supported by clinical evidence (Source: National Institutes of Health, Office of Dietary Supplements):
- Vitamin A — supports skin cell turnover and immune defence
- Vitamin C — critical for collagen production
- Vitamin D — supports immune response and tissue repair
- Zinc — essential for wound closure and anti-inflammatory processes
Always consult your doctor before starting any supplements post-surgery.
Hydration and Skin Repair
Hydration is one of the most underestimated factors in recovery. Water keeps skin cells plump and resilient, aids in flushing toxins, and supports the transport of nutrients to the wound site. Aim for at least 8–10 glasses of water daily unless your medical team advises otherwise due to specific conditions.
Exercise Limits After Surgery
Physical activity must be reintroduced gradually. The exercise limits after surgery depend on the type of procedure:
- First 1–2 weeks: Rest is priority. Short, gentle walks within the home are usually safe and beneficial for circulation.
- Weeks 3–6: Light activity can increase as per your surgeon’s clearance.
- 6 weeks onwards: More structured activity may resume with approval.
Avoid any exercise that strains or stretches the wound site. No heavy lifting, intense cardio, or activities that cause the incision to pull.
Smoking and Surgical Wound Healing
If there is one lifestyle factor that dramatically undermines surgical recovery, it is smoking. Research consistently shows that smoking and surgical wound healing are a dangerous combination. Nicotine constricts blood vessels, reducing oxygen and nutrient delivery to the wound. Smokers have significantly higher rates of wound infection, dehiscence, and poor scarring outcomes.
If you smoke, stopping even temporarily during the recovery period can make a meaningful difference. Speak to your doctor about cessation support.
Quick Reference: Wound Care Do's and Don'ts
-
| DO |
DON’T |
| Wash hands before every wound contact |
Touch the wound without clean hands |
| Use sterile saline for wound cleaning |
Use hydrogen peroxide or iodine unless prescribed |
| Change dressings as directed |
Let wet or soiled dressings stay on |
| Monitor daily for infection signs |
Ignore spreading redness or fever |
| Eat protein-rich, nutritious food |
Skip meals or rely on junk food |
| Stay hydrated |
Smoke or consume alcohol during recovery |
| Follow your surgeon’s activity limits |
Exercise beyond recommended levels |
| Call your doctor when in doubt |
Attempt to treat infections at home alone |
Special Situations: When Home Care Is Not Enough
Sometimes, even the most diligent home wound care is not sufficient. There are situations where professional nursing support at home can make all the difference — without the stress and expense of repeated hospital visits.
When You Need a Home Nursing Visit
- Complex or large surgical wounds requiring professional dressing changes
- Patients who are elderly, diabetic, or immunocompromised
- Wounds with drainage tubes or vacuum-assisted closure (VAC) systems
- Patients living alone with limited mobility
- Post-operative care after orthopaedic, cardiac, or abdominal surgeries
At Zenlife Home Healthcare Pvt Ltd, our registered nurses and trained care professionals bring clinical-grade wound care directly to your home. We handle dressing changes, wound assessments, suture/staple removal (on prescription), infection monitoring, and complete post-surgical recovery support.
Heal Well, Heal Safe — With the Right Support
Learning how to care for a wound at home after surgery is a genuine skill — one that combines vigilance, consistency, and the right knowledge. From proper wound cleaning and dressing changes to identifying infection and nourishing your body for recovery, every detail in this nurse’s guide plays a role in ensuring your surgical wound heals cleanly and completely.
You do not have to navigate this alone. Zenlife Home Healthcare Pvt Ltd is committed to bringing safe, professional, compassionate healthcare to your doorstep. Our team of skilled nurses and healthcare professionals are here to support your recovery every step of the way.
📞 Ready for professional wound care at home? Get in touch with our team today.
Visit us at – Zenlife Home Health Care Pvt Ltd
FAQs (Frequently Asked Questions)